
 Account

The 15-Minute Weekend: Quick Fixes to Refresh Your Tired-Looking Paving
16 January 2026


12 November 2025

30 October 2025

29 September 2025

24 September 2025


21 May 2025

23 January 2025

15 January 2025

14 December 2024

09 September 2024

08 July 2024

05 June 2024

13 May 2024

24 April 2024
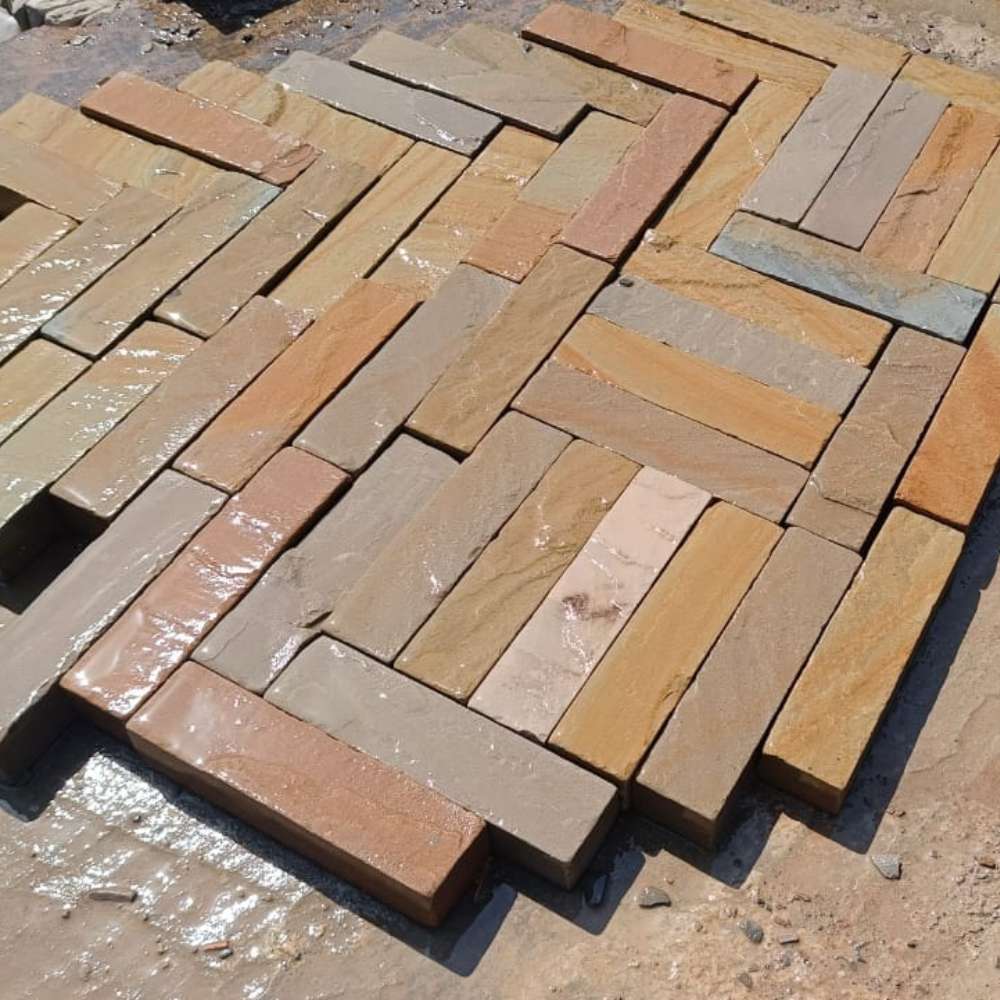
Sand, cement, and water are used to fill the spaces between sandstone pavers in a process called grouting. This procedure is essential for sandstone paving since it accomplishes several goals. Grout sandstone paving enhances the stability of the pavement by securing the pavers in place, preventing shifting or movement.
First, grouting improves the stability of the pavement by holding the pavers firmly in place and preventing them from moving. Second, it aids in preventing the growth of weeds and deters insects from building their nests between the stones. Grouting also makes the paved area more aesthetically pleasing by giving it a consistent finish and lowering the possibility of trip hazards brought on by uneven surfaces. In general, grouting guarantees sandstone paving's toughness, security, and aesthetic coherence.

The ideal grout for sandstone usually relies on the particulars of the project as well as the final result. Sanded grout, on the other hand, is frequently suggested for indian sandstone paving because of its capacity to close bigger spaces and offer superior support for the stones.
Sanded grout provides better stability and longevity because it is made of sand, cement, and additives. Additionally, it helps to keep the paving from shrinking and cracking over time, which makes it appropriate for outdoor applications where the paving may be exposed to a range of weather conditions. You can improve the overall aesthetic appeal by choosing a grout color that goes well with the sandstone's natural tones.
Yes, sealing sandstone slabs before grouting is a good idea. By keeping grout from seeping through the sandstone's porous surface, sealing facilitates maintenance and guarantees a cleaner finish. Additionally, it shields the slabs from possible stains. For maximum results, wait until the sealer is totally dry before starting the grouting process.

The optimal method for grouting paving slabs is to go through a methodical approach that will guarantee a long-lasting, consistent, and attractive finish.
Here are the steps to follow:
Preparation: Prepare the pavement slabs by making sure they are dry, clean, and devoid of loose particles or debris. Thoroughly sweep the surface to remove dust or debris.
Sealing (optional): If you'd like, coat the sandstone slabs with an appropriate sealer. Let it dry fully before proceeding. Sealing makes cleanup simpler and helps prevent grout from seeping through the sandstone's porous surface.
Mixing: Prepare the grout mixture as directed by the manufacturer. Sand, cement, and water are usually mixed together to the appropriate consistency.
Application: Apply the grout mixture to the surfaces of the grouted sandstone paving slabs using a grout float or trowel to ensure the spaces between them are fully filled in. Work in small areas to prevent the grout from drying up too rapidly.
Packaging: To ensure complete coverage and eliminate air pockets, pack the grout firmly into the spaces left by the grout application with a grout float or pointing tool.
Cleanup: After giving the grout a brief period to set—usually 15 to 30 minutes—use a damp sponge or towel to remove any leftover grout from the slab surfaces.
Final Finishing: Use a dry cloth or brush to remove any residue or haze from the slab surfaces once the grout has completely set, which usually takes 24 to 48 hours.
The durability and visual attractiveness of your sandstone paving slabs can be improved with a grout finish that looks professional by carefully following these instructions.
All About Sandstone for Paving
Choose an outdoor grout that has been treated with a polymer when choosing grout for sandstone pavers. For compatibility and endurance, look for one made especially for natural stone.
Select a hue that accentuates the sandstone's inherent beauty without taking away from it. Make sure the grout is permeable to avoid moisture accumulation, which, over time, may harm the sandstone.
Before applying it to the entire surface, evaluate color and compatibility on a tiny test area. Lastly, to get the best effects and long-term performance for grout sandstone paving, prepare and apply according to the manufacturer's instructions.

Use a clean bucket and water to mix grout for sandstone pavers, following the manufacturer's directions. Mix until a lump-free, creamy consistency is achieved.
After a few minutes of resting, give it another stir. Using a grout float, apply the grout to the paved surface, pressing it firmly into the joints at a 45-degree angle. To guarantee uniform coverage, work in small parts. While the grout is still wet, use a grout sponge to remove extra grout from the surface, taking care not to get too much in the joints. Before washing the surface, let the grout cure in accordance with the manufacturer's recommendations.
Grouting sandstone paving requires a smooth, polished finish, so begin by thoroughly cleaning the surface and clearing away any extra mortar. Apply the grout mixture in small areas using a grout float, making sure to push it firmly into the spaces between the stones.
After the grout has been applied, carefully wash away any excess by using a grout sponge bathed in water, being cautious not to remove too much. Use a dry cloth to polish the grout's surface once it has half cured to get rid of any haze. To preserve and improve the grout's appearance, seal it at the end.

Get excellent accessories and sandstone paving at great pricing. The Stonemart offers premium goods that will elevate your outdoor area since they offer a perfect blend of value, durability, and attractiveness. Transform your surroundings with the best in class offerings today.
Thanks for subscribing!
This email has been registered!


